- Beauty, Hair Care, Wellness
The Ultimate Guide to Hair Straightening - Tips, Techniques, and Products
- March 28, 2024
- Zanya
Introduction
Are you tired of battling frizz, curls, and unruly waves every time you style your hair? Do you dream of effortlessly sleek and straight locks that exude confidence and sophistication? If so, you’re in the right place! Welcome to our comprehensive guide to hair straightening, where we’ll cover everything you need to know about straightening your hair, including techniques, tools, products, and tips for achieving results at home.
Understanding Hair Straightening: What You Need to Know
Hair straightening is a popular styling technique that involves temporarily altering the natural texture of your hair to achieve a smooth, sleek look. Regardless of you have naturally curly, wavy, or frizzy hair, straightening allows you to transform your mane into a look of beauty.
Understanding Hair Types
Before diving into the world of hair straightening, it’s essential to understand your hair type. Different hair textures require different approaches to achieve optimal results.
Here’s a brief overview:
- Straight Hair: Straight hair typically requires less effort to straighten but may still benefit from a smoothing treatment to eliminate frizz and add shine.
- Wavy Hair: Wavy hair can be straightened with relative ease but may require higher heat settings and more passes with the straightening tool.
- Curly Hair: Curly hair often requires more time and effort to straighten due to its natural texture. Using the right techniques and products is crucial for achieving sleek results without causing damage.
- Coily/Kinky Hair: Coily or kinky hair tends to be the most challenging to straighten, as it has a tighter curl pattern. Gentle heat and moisture-locking products are essential for preventing heat damage and maintaining moisture levels.
Preparation
Before straightening your hair, it’s essential to prepare it properly to minimize damage and maximize results. Here are some steps to follow:
- Wash and Condition: Start by washing your hair with a hydrating shampoo and conditioner to remove any product buildup and ensure that your hair is clean and moisturized.
- Apply Heat Protectant: Always use a heat protectant spray or serum to shield your hair from the damaging effects of heat styling tools.
- Detangle: Use a wide-tooth comb or detangling brush to gently remove any knots or tangles from your hair before straightening.
- Section Your Hair: Divide your hair into small sections using clips or hair ties to ensure that you can straighten each section thoroughly and evenly.
Techniques:
There are several techniques for straightening hair, each suited to different hair types and desired results. Here are three popular methods:
- Blowout: Start by blow-drying your hair using a round brush to smooth and straighten it. Once your hair is mostly dry, use a flat iron to further straighten and refine your style.
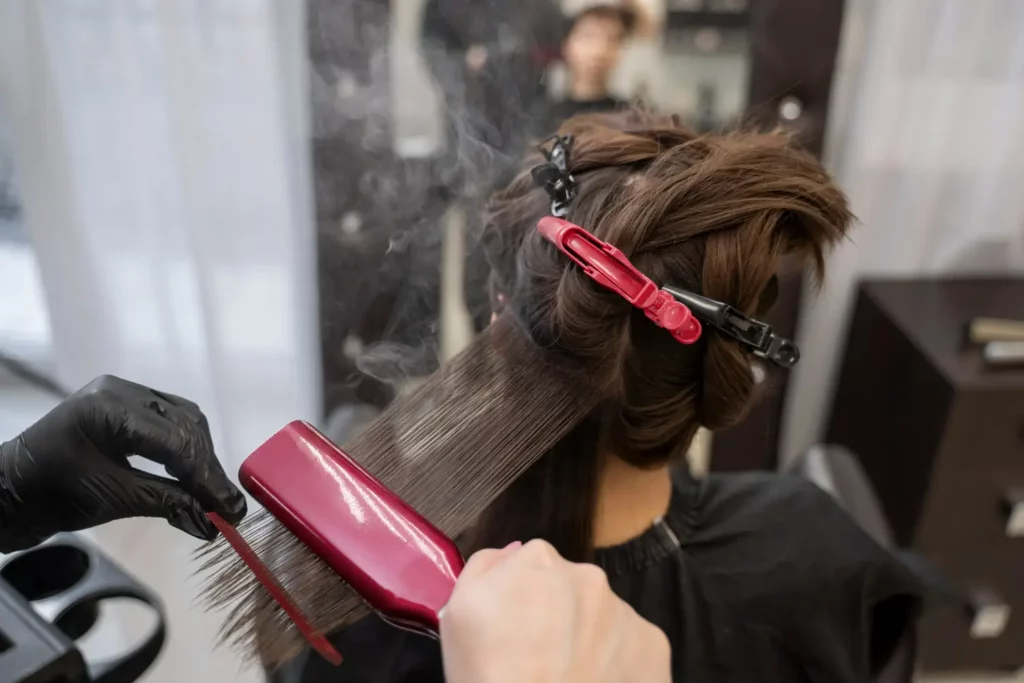
- Flat Iron: This classic method involves using a flat iron to straighten small sections of hair from roots to ends. Take your time and use even pressure to achieve sleek, straight results.
- Chemical Straightening: For those seeking more permanent results, chemical straightening treatments such as keratin treatments or Japanese straightening can provide long-lasting straightness, but they should be done by a professional to minimize damage.
Products:
Choosing the right products can make a significant difference in the outcome of your straightening efforts. Here are some essential products to consider:
- Heat Protectant: Look for a heat protectant spray or serum that provides thermal protection while also adding shine and reducing frizz.
- Straightening Cream or Serum: Use a straightening cream or serum to help smooth the hair cuticle and keep frizz at bay.
- Anti-Frizz Spray: An anti-frizz spray can help lock in moisture and prevent humidity from ruining your straightened style.
- Hair Oil: A lightweight hair oil can add extra shine and hydration to your straightened hair while also protecting it from environmental damage.
The Straightening Process: Step-by-Step
- Section Your Hair: Divide your hair into manageable sections using clips or hair ties. This makes it easier to work through each section and ensures that you don’t miss any areas
- Start Straightening: Begin straightening your hair one section at a time, starting from the bottom and working your way up. Use a flat iron or blow dryer with a round brush, depending on your preferred method.
- Work in Small Sections: For optimal results, work in small sections, taking thin, even slices of hair to ensure thorough straightening. Run the flat iron or blow dryer through each section slowly and evenly, starting from the roots and working towards the ends.
- Finish with Shine Serum: Once you’ve straightened all sections of your hair, finish with a lightweight shine serum or hair oil to add gloss and smoothness. This helps to seal the cuticle and lock in moisture, leaving your hair looking shiny and sleek.
Tips for Success:
Achieving salon-worthy straight hair at home requires practice, patience, and attention to detail. Here are some additional tips to help you get the best results:
- Invest in a High-Quality Flat Iron: A good-quality flat iron with adjustable heat settings and ceramic plates will provide better results and minimize damage to your hair.
- Don’t Skip the Heat Protectant: Using a heat protectant is non-negotiable when straightening your hair. It creates a barrier between your hair and the heat of styling tools, preventing damage and breakage.
- Use the Right Temperature: Adjust the temperature of your flat iron based on your hair type and texture. Lower heat settings are suitable for fine or damaged hair, while higher heat settings may be necessary for thicker or coarser hair.
- Limit Heat Exposure: Avoid straightening your hair every day to prevent heat damage. Instead, opt for heat-free styling methods like air-drying or using heatless curling techniques on non-straightening days.
- Maintain Your Style: To prolong the lifespan of your straightened hair, avoid excessive touching, and use a silk or satin pillowcase to prevent friction while you sleep.
- Protect Your Hair at Night: Wrap your hair in a silk or satin scarf or sleep on a silk pillowcase to prevent friction and maintain your straightened style while you sleep.
- Regular Trims: Schedule regular trims every 6-8 weeks to remove split ends and keep your hair looking fresh and healthy
Conclusion:
With the right techniques and products, achieving sleek, straight hair at home is entirely possible. Regardless of your preference of a flat iron, the volume of a blowout, or the long-lasting results of chemical straightening, there’s a method that’s perfect for you. Remember to prioritize the health of your hair by using heat-protectant products, limiting heat exposure, and maintaining a consistent hair care routine.